SEASON 5 ENDED
10-29 Points: 5% Discount
30-49 Points: 10% Discount
50-59 Points: 20% Discount
60-69 Points: Vaulted Promo and 20% Discount
70 Points: Mystery Prize and Vaulted Promo and 30% Discount
Collapsible content

Week One: The Hotel’s Invitation
Welcome to Challenge Season 5! In this first week, we explore a scenario inspired by Logan the Backrooms Nerd’s Level Design idea: The Hotel’s Invitation.
You thought you won a dream vacation—luxury, comfort, relaxation. But once you enter, something feels wrong. The hotel’s timeless elegance, paintings of endless corridors, and empty reception desk with silver keys seem off. Then, the paintings shift, the lights flicker, and you realize you're not alone. The hotel is trapping you, and you must make the right choices to escape.
Two Paths in the Hotel:
Path One: Follow the Paintings
The paintings aren’t just art—they’re traps. Figures appear, hallways loop endlessly, and soon the figures start bursting from their canvases.
Battle in the Shifting Halls (Lv3):
Defeat three entities of different light levels (yellow, green, and red) in the hotel. Each victory brings you closer to the truth but at the cost of your sanity. After each defeat, flip the Position Token: if it lands Gem-side up, you’ll see yourself inside the painting and lose 5 Sanity or discard an item from your Inventory.
Fluid Walls (Lv1):
The hotel shifts as you move. Swap the cards on the left and right of your Position Token every time you move, even moving Permanent Fixture/portal cards.
Windowed Reality (Lv2):
One painting isn’t just a painting—it’s a Window entity. Once you have 3 different colored entities, reveal cards from the Pull Pile until you find an entity with at least 5 Health. Engage it, discard any current engaged entity, and flip the Position Token when attacking with an item. If it lands Gem-side up, the item flips facedown and deals only 1 damage instead of its normal effect.
The Final Portrait (Lv3):
The last painting isn’t shifting—it’s a reflection of you. After your deck runs out, when the Void appears, shuffle all entities in your Inventory and place them face down in the engagement zone. Reveal the top entity and defeat all three consecutively. Once defeated, the wall behind the portrait crumbles, revealing a tunnel and two monitors. A message appears:
"Now I see you. You’ve been marked. Stand by."
Path Two: Pursue the Scream of the Lost Guest
You thought you were alone, but unfinished meals, warm coats, and a voice calling for help tell a different story. Someone else was here—or still is.
Setup:
Choose a companion card as the Lost Guest. Shuffle 1 Lecture Hall, 2 Dead Ends, and 2 random red light entities to form the Search Stack, placed in the NLD zone. These cards don’t count toward your deck-building light limits.
Echoes of a Guest (Lv2):
The Lost Guest left notes, hinting that they lost their room key. Each time you enter a Destroyed Hall, reveal the top card of the Search Stack:
If it’s a Dead End, take 2 DIH damage and place it on a valid FOP space.
If it’s an entity, engage or discard it and take the Sanity loss.
If it’s the Lecture Hall, you’ve found the key. Shuffle it into your deck, then locate and enter the Lecture Hall.
Inside the Room (Lv3):
The Guest’s notes hint at a way out, but reality is shifting. You must collect two special items before you’re trapped forever. Each time you enter the Lecture Hall, flip the Position Token:
If Gem-side up, you find a special item. Draw an item from the Pull Pile and add it to your Inventory.
If Compass-side up, you may spend 5 Sanity to flip again in search of an item.
You need to find 2 Special Items.
Vanishing Hallways (Lv2):
Hallways now cost you 3 Sanity each time you move. Each Hallway you move off of is discarded. You need 4 Hallways in the Discard Pile to complete this challenge.
The Guest’s Last Words (Lv2):
The final note reads: "It sees you now." To complete this challenge, have 3 Dark Halls on the FOP at the start of your Movement round. Then, enter 2 of them back to back.
The darkness leads you to the same two monitors. A flash of light, and the message appears:
"Now I see you. You’ve been marked. Stand by."
The Hotel Was Never Just a Hotel.
It was a lure, a test, and now you’ve been seen. The golden glow fades, replaced by the harsh flicker of a CRT screen. The hotel is gone, but the monitors remain. Someone—or something—awaits you on the other side.
Collapsible content
Week Three: The Phantom’s Haunting
You’re not just dealing with the usual madness of the Backrooms. This time, you’re being hunted. A spectral entity lurks within the Lobby Levels, flickering in and out of existence, watching your every move. It is known as The Phantom—a relentless and otherworldly presence that cannot be fought like a normal Unfriendly entity. Instead, it must be confronted methodically, either by engaging it in battle across specific rooms, or by uncovering the secrets to banishing it for good.
But time is against you. The more you resist, the more the Backrooms twist around you. The Phantom isn’t just haunting these halls—it’s warping them.
Path One: The Phantom’s Pursuit
You choose to fight, but beware, for this is no ordinary battle. The Phantom entity must be tracked down to the specific rooms it’s bound to, then engaged and attacked multiple times before it can be finally be destroyed. After every attack, it vanishes, forcing you to press deeper into the labyrinthine layout of the Backrooms, while knowing that each encounter will sap your sanity and drain your resources.
If you're the type who prefers a direct confrontation, this is your path—but there's a catch. The Phantom isn't just some brute you can fight anywhere. It can only be engaged and damaged in specific locations, meaning you’ll need to navigate the Backrooms carefully, striking when the moment is right.
SETUP
To choose the Phantom, you’ll choose 3 Purple entities of your choice and shuffle them face down together. Then choose one randomly and keep it face down. Set it in the Next Level Deck zone. You may not look at this entity until specified. This Purple Light entity does not count towards your deck building light limits.
NOTE: Attacking the Phantom requires you to not be engaged with another entity when you choose to spend Sanity and attack it. Place the face down card from the NLD zone into your engagement zone, keeping it face down. Once you have attacked it, it will return to the NLD zone.
Strike in the Hallway (Lv1):
After entering a Hallway, you may spend 3 Sanity to engage and attack the Phantom. It deals 2 DIH damage and 2 Sanity Loss. After dealing at least 2 Damage, The Phantom vanishes from view. Place it back onto the NLD zone out of play. You must navigate to a Dead End next to be able to Engage and damage it.
Ambush at the Dead End (Lv2):
Once in a Dead End, you may spend 4 Sanity to engage and attack The Phantom again. It deals 3 DIH damage and 3 Sanity Loss. After dealing at least 3 Damage, you’ll flip the Position Token. If it lands Gem-Side up, the Phantom retaliates, dealing 5 Sanity loss. Then return it to the NLD Zone. You must navigate to a Destroyed Hall next to be able to Engage and damage it.
Trap it in a Dead End (Lv3):
In a Destroyed Hall, you can spend 5 Sanity to engage and attack the Phantom again, but here it becomes enraged. It deals 4 DIH damage and 4 Sanity Loss. Once you deal at least 4 Damage, the Phantom dissipates, nearly dead but still holding out for the final attack. Return it to the NLD zone. You must navigate to a False Wall next to be able to Engage and damage it.
The Final Blow at the False Wall (Lv3):
The last strike must be at the False Wall. Once you move into the False Wall, The Phantom is finally vulnerable. Pay 5 Sanity to flip it face up now and place it in your engagement zone. Follow normal engagement rules, losing sanity as shown on the entity and taking DIH damage as usual. Once it’s defeated, place it in the discard pile. The backrooms falls silent as the shadow of the phantom disappears for good.
This path is all about tracking, strategy, and timing. Are you patient enough to wait for the right moment to strike?
---
Path Two: The Phantom’s Banishment
You decide to take a different route. Rather than fighting it head on, you seek to unravel the mystery to banish it before it can overwhelm you. You learn from Freeman that the Phantom is bound to this place by cursed objects scattered across the Backrooms. If you can locate these special items and discard them in the right locations, Freeman hypothesizes that you might send it back to whatever void it crawled out of. Hopefully before it can drain you completely.
[The Hunt for Cursed Items]
You must locate four specific items to complete the ritual. NOTE: You may only have one of each of these in your deck:
Death Moth Jelly
Cloak Coat
Flash Sphere
Dumb Gum
The Phantom’s Rage (Lv3):
Until all four items are discarded, The Phantom continues to follow you and has the following abilities:
AGGRESSION: At the start of every round, lose 2 Sanity unless you discard an item.
FEAR: Each time you Deck Out, lose 5 Sanity.
RETALIATION: Once you place out the new No-Clip round (and finish placing out any Navigation Points you gained), if there are any entities, you must engage the one with the highest Sanity Loss.
[1st] Offering at the Hallway (Lv1):
Discard Death Moth Jelly in a Hallway to begin the ritual without using its effect.
Once discarded, The Phantom becomes less aggressive, reducing its Sanity drain to 1 per round.
[2nd] Shedding the Cloak in the Corner (Lv2):
Discard the Cloak Coat in a Corner to further weaken The Phantom.
This prevents it from using its Fear ability (Decking out does not cause Sanity loss anymore).
[3rd] Flashing Light in the Dead End (Lv2):
Discard Flash Sphere in a Dead End to reveal The Phantom’s true form, stopping it from using its Retaliation ability (No-Clipping does not force you to engage an entity).
[4th] The Final Offering at the False Wall (Lv1):
Discard Dumb Gum at the False Wall to complete the ritual and banish The Phantom permanently. Gain a Painite Gem upon banishing the Phantom.
Once this is done, you are free from its grasp and may finally find the Golden Stairs card and escape.
This path is all about exploration and resource management. Can you locate the necessary items and get rid of them before The Phantom drains your mind completely?
---
The Phantom’s Defeat... But at What Cost?
No matter which path you take, the end is the same—The Phantom is gone. The Lobby Levels fall silent. The air is still.
And then you realize something is wrong.
The space around you flickers and distorts. The air feels thicker, almost like you’re wading through something unseen. The very walls of the Lobby Levels tremble, their familiar forms warping—stretching, collapsing, reforming.
The lobby wallpaper dissolves, flaking away into drifting particles before vanishing entirely. The warm lighting dies, replaced by the harsh fluorescence of flickering overhead lamps. The soft carpet beneath your feet hardens, turning to rough asphalt.
Concrete pillars rise from nowhere, stretching into a ceiling lost in shadow. The endless hum of the hotel’s background noise is gone, replaced with an ominous silence.
And then—the cars appear.
At first, they are nothing more than hazy silhouettes, flickering between reality and something else. Then, they solidify, rusted metal and shattered windows taking shape before your eyes. Rows of abandoned vehicles stretch endlessly into the distance, their interiors dark and lifeless.
The Lobby Levels are gone.
You have fallen into the Car Park.
And the mystery only deepens.
Collapsible content
Week Four: The Dark Vortex
Welcome back to Week Four of the Challenge Season,
Last week, you dealt with the terrifying Phantom, who haunted you as you either searched for a way to fight it off or pursued a ritual to banish it from the Backrooms. After you successfully managed one of those two routes, the Lobby Levels began to shiver and change, and soon, things were rapidly turning in a way you couldn't have expected...
After dealing with the Phantom, the Lobby Levels convulse violently, their once-familiar structure unraveling before your eyes. The ornate hallways twist and buckle, their warm lighting flickering into an eerie, sterile glow. The soft carpet beneath your feet hardens into rough asphalt, and the elegant wallpaper peels away, revealing cold, gray concrete. Doors and corridors warp into towering support pillars, while distant chandeliers shatter into buzzing fluorescent lights. Worst of all, an unseen force pulls at you, dragging you deeper into this bleak, industrial abyss as the remnants of the Lobby Levels dissolve into the endless, hollow expanse of the Car Park.
You come to the realization that the Phantom was never the true horror. It was simply the shadow of something much larger, something Freeman has dubbed, “The Dark Vortex”.
A swirling, chaotic void of pure decay and horror, the Vortex does not hunt you like the Phantom did, nor does it think to chase. It simply exists—a supernatural rupture in reality that distorts navigation, warping safe paths into deadly traps and turning your own movements against you.
If you cannot find a way to escape it, you know only one thing for certain: it will consume you.
**NOTE: For this scenario, you must build a Car Park Level deck. There must be at least 5 Gem-Eligible Unfriendly entities in the deck.
**
Path One: The Vortex Breaker
You choose to fight the chaos. Not against the Vortex itself, but rather the horrifying entities that it unleashes upon you. The deeper you go, the more horrors emerge, drawn to the chaos and instability like moths to a flame. You must hold your ground, facing the nightmares spawned from the chaos and breaking through before the Vortex devours everything.
SETUP
Before the game begins, choose 3 random purple light entities to be the potential “Devourer of Paths”. **Shuffle these 3 and set them aside in a facedown pile in the NLD zone.**
1. Into the Abyss (Lv3):
- The second navigation point you place each round risks uncovering something—an enemy, a trap, or nothing at all. If you reveal less than 2 Navigation points during your movement phase, nothing happens.
- If you reveal an Unfriendly Entity, it causes your currently engaged entity to attack immediately (Before the action round has begun) or immediately engages you if you’re unengaged. Friendly entities do not trigger any effect.
- If it’s an attack item, it triggers suddenly, dealing DIH damage to you equal to its attack power.
- If it’s any other item, it fills your mind with visions of horror, dealing 3 Sanity loss.
- If it’s a room card or Outcome card, consider yourself lucky—no additional effects occur.
2. The Swirling Chaos (Lv3):
- You must defeat three Gem-eligible Unfriendly Entities with at least 4 Health before facing the final horror.
- Each time you defeat one of these Gem-eligible Unfriendly entities, place a navigation point in a space adjacent to your current position, and activate it according to the “Into the Abyss” challenge (Unfriendly entity engages you, attack item hits you for DIH equal to its power, other item deals 3 Sanity loss).
3. The Final Horror (Lv2):
- Once you’ve defeated three Gem-eligible entities, the Dark Vortex itself manifests an ultimate nightmare—The Devourer of Paths. Reveal the top card of the Purple Light entity stack you set aside before the game begins and engage with it automatically. It deals +1DIH Damage each round.
- This entity absorbs the second navigation point you would place out each Movement round, shuffling it back into the Pull Pile. If you only place 1 Navigation point in the Movement round, reveal the top card of your DIH and activate it according to the “Into the Abyss” Challenge (Unfriendly entity causes the Purple Light entity to attack you before the Action Round begins, attack item hits you for DIH equal to its power, other item deals 3 Sanity loss), then place the card back on top of your Deck in Hand.
- Defeat it, and gain an automatic Painite Gem. The Vortex begins collapsing, releasing its hold on your and allowing you to finally locate the Golden Stairs and escape.
This path is a test of endurance and tactical combat—can you outlast the Vortex’s tricks and take down the horrors
Path Two: The Vortex Manipulator
You recognize that this isn’t a battle to be won through brute force, but rather you intend to manipulate it in your favor. You must navigate the chaos, using the Vortex’s instability against itself, and take out some of these entities that are actively hunting you. By triggering the right anomalies, you may just be able to trick the Backrooms into letting you go.
1. Dancing with the Void (Lv3):
- Your objective is to trigger the Dark Vortex’s traps intentionally—but only when it benefits you.
- You must reveal four Attack items while engaged with an Unfriendly entity. Any of the Navigation points you place during the movement round can potentially reveal a trap item, Attack item, an entity, or nothing at all.
2. Tricks and Traps (Lv2):
-If you reveal an Attack item, you can redirect its damage onto an engaged Unfriendly instead of taking the DIH damage yourself. You must defeat at least 2 Entities using trap damage as the final damage.
-If you reveal an Item card, you lose 5 Sanity, and then may immediately place a navigation point anywhere on the field. If you reveal an attack item from this effect, you may use the damage from the attack item on an engaged Unfriendly entity.
If you reveal a room card, nothing happens.
3. Unraveling the Vortex (Lv3):
- With four traps sprung on unsuspecting Unfriendlies and two entities defeated by trap damage, the Vortex begins to collapse. The unstable energy is intent on taking everything with it, so you must escape before it makes you its victim!
-At the start of each Action round, reveal the top card of the Pull Pile and activate it:
- If you reveal an Unfriendly Entity, it causes your currently engaged entity to attack immediately (Before the action round has begun) or immediately engages you if you’re unengaged. Friendly entities do not trigger any effect. If the entity doesn’t engage you, discard it.
- If it’s an attack item, it triggers suddenly, dealing DIH damage to you equal to its attack power, then discard it.
- If it’s any other item, it fills your mind with visions of horror, dealing 3 Sanity loss, then discard it.
- If it’s a room card, nothing happens, it simply gets discarded.
- If it’s an Outcome card such as the Golden Stairs or the Void, shuffle it into your Deck in Hand.
Find the Golden Stairs and escape!
This path is about strategy, deception, and precision movement—can you outwit the Vortex and slip through its grasp before it consumes you along with everything else?
---
The Final Choice: Stand Against the Chaos or Slip Through the Cracks?
The Dark Vortex is relentless, warping reality in ways you can hardly comprehend amidst the entire scene of chaos. Will you fight your way through the horrors it spawns, forcing an escape? Or will you weave through the chaos, using its own distortions to take out the beasts that burden you before finally slipping out of its grasp?
One thing is certain—you have been forced to go too deep, and the Backrooms will not let you go easily.
Choose wisely, Wanderer. The void is waiting.
As usual, complete as many challenges from your chosen path as you can and submit your escape on the thread for validation by the team!
Good luck Wanderers, and keep on running!
The Backrooms TCG Team
Collapsible content
Week 5: The Origin of Evil
Scenario Designed by MegaElite19 and refined by NowayArtemus
Welcome back to Week 5 of the Challenge Season. Last week, you had to deal with the monstrous Dark Vortex, so we hope you were able to make it through no matter your chosen path! This week, prepare to meet the face of evil!
Deep within the twisted depths of the Painite Caves, the air reverberates with an endless humming energy. For an untold amount of time, you have wandered blindly through these tunnels, searching for an exit, but denied at every turn. Then, when you finally felt like your energy has been fully expended, you stumble upon a massive black door with a trio of deep cavities that line its surface. One of them is already fitted with a Painite Gem that glows faintly in the hazy air. You can only imagine that somebody else must have traveled these dark corridors before you, and managed to get this far before they disappeared into the darkness to gather more.
As you step closer, the buzzing of unseen fluorescents can be faintly heard from behind the door. Could this be a way out, perhaps? You search your pockets for the gems you already have, and pull 2 out, just enough to fill up the door, and hopefully power it. With a deep breath, you place them in the remaining slots. A moment passes before the door finally groans, metal grinding against metal as it swings open.
Past the newly exposed threshold waits a familiar yellow corridor, its flickering lights casting long dark shadows that sit unnaturally in every corner. You’ve once again found yourself in the Lobby Level, a place you’ve been many times before in the past. Unbelievably, you seem to have come full circle in this endless nightmare. You rub your eyes and step forward, but before you get any farther, a crackling field of energy blocks your path, stopping you from leaving. It’s quickly apparent to you that someone refuses to let you leave, but who, or what, could it be?
Out of the corner of your eye, half-hidden in the dim light, you notice a pulsating red glow emanating from the far end of the room. Nestled within the chest cavity of an imposing statue, you spot a Painite Gem that’s unlike any other. It’s larger and darker, its liquid light infused with a mesmerizing gleam. As though you were hypnotized by an unknown force, you clamber up the statue and attempt to pry the gem from its cozy resting place.
Without exerting yourself too much, you find that it comes loose with surprising ease. But as soon as you pull it free, a deep rumble emanates from the walls around you, causing you to drop the gem on the floor. As the ceiling begins to collapse, you turn back the way you came as the fight or flight instinct ramps up hard, but the threshold has actually sealed up, trapping you in the Lobby Levels.
When the rumbling finally ceases, you turn back to retrieve the Gem, but notice it’s gone! Where it dropped, you find now stands a tall, lean man who’s draped in a dark coat, his face twisted into a grin just a little too wide to be entirely human. His disturbed eyes flicker with an indescribable emotion that’s both ancient and hungry.
“Hello, Wanderer,” he says, his voice simultaneously smooth yet jagged, like a broken record. “I must thank you. That cave was quite the prison.”
Your throat tightens as your breath shudders, words barely coming out in a choke. “Who… who are you?”
The grin widens. “Names are particularly fickle things. But for now, you may call me the Conductor.” He tips his black Conductor’s hat in a mock example of politeness. “Now that I am free, I think it’s time to grab hold of the reins of this little place.”
Panic and confusion surge through you. “Free? From what? Where did you come from?”
The Conductor chuckles, his smile tilting, gaining an edge of malice. “Oh, you don’t need to understand. You need only run, while there’s still time.”
A dark Void rips open behind him. Before you can even think how to react, he steps through and vanishes into the abyss. Your heart pounds wildly, knowing that nothing good could possibly come from this thing having free reign in the Lobby Levels. And worst of all, he has that special Painite Gem.
PATH 1: The Device of Salvation
Time has passed since your horrifying encounter with the Conductor, and you have found your way back to an old encampment led by the ever resourceful Lady Lindy. She reports that since The Conductor arrived with that strange Painite, the Backrooms have begun to change. Wanderers and even Agents from an unspecified research organization have begun to turn violent, driven by unseen forces. Strange artifacts have started appearing, relics that are seemingly powered by Painite Gems.
Lindy presents you with one such artifact, a strange metallic cube she calls a BSCOS Device, which is capable of housing and manipulating Painite energy. “Surely, you’ve seen the Golden Stairs, an escape route from the Backrooms. The Conductor is now trying to create an exit of his own, using the power of that special Gem.” She claps a steely hand on your shoulder and stares deep into your eyes with fierce determination. “We cannot let that happen.”
She hands you the device. “Find Mr. Freeman. He knows more about Painite than anyone. And while you’re at it…” she glances toward her people, bruised and battered from countless encounters, “take down as many of those Lost Agents as you can. They’re a danger to us all.”
You grip the device tightly. You have a plan, allies, and a mission. Now, it’s time to stop The Conductor before his influence spreads beyond the Backrooms.
NOTE: Mr. Freeman does not have an ability when he is your Companion during this scenario.
SETUP: You must have the BSCOS Device in your Deck, as well as at least 5 Lost Agents and 1 Conductor. Start the game with the B.S.C.O.S. Device in your inventory.
CHALLENGES:
The Painite Powered BSCOS Device (Lv1) – Start the game with the B.S.C.O.S. Device in your inventory. (This counts as one of the items in your deck) It cannot be stolen, discarded, or destroyed. Each time you gain a Painite Gem from a gem eligible entity, that entity goes into your Inventory facedown beneath the BSCOS Device to represent the carried gem. As you collect Painite Gems, the device grows stronger:
**1 Gem**: Regain 1 Sanity at the start of each Action Round.
**2 Gems**: You regain 1 Sanity at the start of each Action round, and each room you enter now gives you +1 Navigation points as it reveals hidden paths.
You may discard a Gem from beneath the BSCOS device to use as an attack item** to instantly defeat a Lost Agent**.
**The Shadowy Agents** (Lv2) – Lost Agents are the only source of Painite fragments. When engaging one, flip a Painite token:
**Tails:** A strong agent with +1DIH, +1 Health, and +1 Sanity Loss. Only rewards 1 Painite Fragment upon defeat.
**Heads**: A high-grade agent with +2DIH, +2 Health, and +2 Sanity Loss, empowered by a Painite fragment. Tougher to defeat, but grants 2 fragments upon defeat.
(Fragments should be tracked off to the side using a die or counters.)
** Fragmented Memories** (Lv3) – While Mr. Freeman is your Companion, you may change 4 Painite fragments into a Painite Shard. Place a counter on Mr. Freeman once you do this. **You must have 2 Painite Shard counters on Mr. Freeman before you can engage the Conductor.**
**The Final Piece**(Lv3) – The Conductor possesses the final, most powerful Painite Gem. You must defeat him and claim it. Then, find the Golden Stairs and enter them while holding two Painite Shards on Mr. Freeman to seal them off and prevent his escape.
**PATH 2: The Pools of Oblivion**
You have seen too much. You have endured too much. The Backrooms, The Conductor, the never-ending corridors… you cannot do this anymore. Your mind is slipping, unraveling with each passing moment.
But then, a memory surfaces. A whispered rumor. A place of peace.
The Dreampools.
Crystal-clear water, gentle warmth, pristine white tiles stretching endlessly into the horizon. No entities. No suffering. Just… rest.
You need to find them.
But first, you must remember where they are. Somewhere in this twisted labyrinth, the Lost Agents carry Memory Fluid, which is said to be an elixir that will unlock the path to the Aqua Zone. You will need multiple of them, as well as a Painite Gem to open the way.
This is your final gamble. Will you escape the madness, or succumb to it?
**SETUP**
**Place 4 Memory Fluid cards and the Aquazone Portal in the NLD zone before the game begins.** These cards do not count towards your deck for deck building light limits. **You must also have at least 5 Lost Agents in your deck, as well as 1 Conductor.**
CHALLENGES:
** The Dreampools** (Lv3) – To escape, gather 4 Memory Fluids from Lost Agents, then shuffle the Aqua Zone Portal into the deck. Locate the portal and enter it with a Painite Gem to escape.
The Memory Drink (Lv3) – Lost Agents hold the key to your escape, but all Agents are now empowered by a Painite fragment and far more dangerous with **+2DIH, +2 Health, and +2 Sanity Loss. **Defeat one and flip the Position token:
**Tails:** The Agent dissolves into liquid and you find nothing.
**Heads**: **Gain a Memory Fluid **and place it in an Inventory slot. It cannot be discarded or reshuffled. All Memory Fluids can occupy the same space in your Inventory.
**A Lost Mind** (Lv2) – Your sanity decreases by 1 at the start of every Action Round. **At the start of the 6th Action round**, your Sanity decreases by 2 at the start of every Action round instead.
**The Hope Device** (Lv1) – You may activate a Flash Sphere in your Inventory to prevent Sanity loss from the “A Lost Mind” challenge until it runs out. At the start of each Action round, rotate the card ¼ (45 degrees). **After 4 Action Rounds, discard it. **
With The Conductor now loose in the Backrooms, the nightmare has only just begun. His influence is growing, warping the very fabric of this twisted world. Will you rise to stop him before his power spirals out of control?
Or will you seek your own escape, leaving the fate of the Backrooms to an uncertain doom?
The choice is yours.
As always complete as many challenges as you can in a single run for your chosen path, and submit your run in the thread for Validation by the team! Thanks for running, Wanderers, and keep watch for Agents!
-The Backrooms TCG Team
Collapsible content
Week Six: The Grim Army ⚙️💀
Scenario Designed by MegaElite19 and refined by NowayArtemus
Hey there , welcome back to Season 5 for Week 6 of the weekly challenges!
Dark times have fallen upon the Lobby Levels since The Conductor’s defeat. You’ve heard that many other Wanderers have found their way out of this twisting labyrinth, but as always, peace never lasts. With the power vacuum left by the Conductor’s demise, an old figure has shown up to haunt the Lobby Levels. This grim shadow of the past is more powerful than before, and he is known by the frightening moniker of the Ancient Conductor, a being twisted by vengeance and dark power.
He flits from shadow to shadow through the winding Hallways and Dead Ends, whispering to the Partygoers and bending them to his will. His plan seems to be as direct as it gets: Lock down the Lobby Levels and wipe out every last Wanderer he and his army of entities come across. Worse still, he remembers you. He knows your face from the encounter you had with his regular incarnation, and this time, he won’t let you escape.
To ensure his victory, he has unleashed his strongest and most powerful assistant, the Scarlett Knight, alongside a monstrous entity known as Bakteria. The Lobby Level itself decays under the influence of this team of terror. Hallways that were once benign now spew forth poison, toxic mushrooms spread unchecked, and entire corridors have collapsed into ruin, walls flecked with evidence of destruction and putrefaction. With no time to waste, you realize that you must make a choice. Will you face this Ancient menace directly or will you find another way to stop his growing army?
PATH 1: FIGHT FOR SURVIVAL
You know that in these dark times, you won’t run, but rather fight back and overcome this monstrous force bearing down upon any and all Wanderers who are unlucky enough to find themselves caught up in the crossfire. The Ancient Conductor is blocking your only path to escape, and there’s no time to rally others. Other Wanderers are surely in danger, but survival is your only priority. If you can kill him, you can get out, but the Partygoers will remain, their numbers unchecked and hungry for blood.
SETUP:
Set the Scarlett Knight and Bakteria in the NLD zone before the game begins. Shuffle them up and keep them facedown.
You must have at least 4 Partygoers in your deck, at least 4 Destroyed Halls, 1 Ancient Conductor, and 1 Crimson Knight,.
CHALLENGES:
Crimson Surprise (Lv2)
You must have Crimson Knight as your Companion in order to engage the Ancient Conductor. Each time you take damage from the Ancient Conductor, place one of the DIH damage under Crimson Knight. If he has at least 4 DIH cards under him, he is too wounded to fight and is discarded.
Ancient Horrors Beyond Comprehension (Lv3)
Defeating the Ancient Conductor is the only way to obtain the Painite Gem, and thus is your only path to survival. When you engage him, instead of summoning entities from the Pull Pile, flip the Position token. If it lands Gem side up, place the Bakteria and Scarlett Knight on each space adjacent to where the Ancient Conductor was summoned from on the FOP. If it lands Compass side up, summon the Scarlett Knight to the FOP space that the Conductor was engaged from.
🔥 Scalding Vapors (Lv2)
Destroyed Halls release scalding fumes now. When moving through these areas, instead of gaining any CCS, they now deal 2 DiH damage in addition to the Sanity Loss. You can still place out Navigation Points. You must enter 2 of these after defeating the Ancient Conductor.
Burning Holes in the Pocket (Lv2)
If you enter a Destroyed Hall and you have any items in your Inventory, you must discard 1 randomly.
PATH 2: THE FUN WAR
An experienced pack of Wanderers have been tracking the movements of the Ancient Conductor through the massive and ever-changing space of the Lobby Levels. Their research has led to the discovery of a hidden Control Room, a place where he has been harnessing the energy of a powerful but cursed Painite Gem, which is said to be the alleged source of his control over the Partygoers.
To stop him, you’ll need to harness the power of an artifact of legend known as the Mirror of the Old Wanderers. Even a single shard of this Mirror holds incredible power, which Freeman theorizes may be enough to purify the corrupted gem and hopefully sever the Ancient Conductor’s hold over the entities.
You must retrieve a Mirror Piece and make your way to the Control Room. With great effort, you might be able to purge the darkness from the gem, and watch its bloody red glow shift to a brilliant emerald. If you can do this, the Partygoers may be freed from his grasp and fight back against their former master.
But the battle won’t be easy, as the Scarlett Knight and Bakteria are sure to show up to try and stop you. If you can defeat them, the Partygoers might rise to fight for you. It’s time to end this war.
SETUP:
Set the Ancient Conductor and the Control Room (CPL) into the NLD Zone before the game begins. These don’t count against your deck building light limits.
You must have **at least 5 Partygoers** in your deck, **at least 3 Poisoned Halls,** and **maximum of 1 False Wall, 1 Bakteria, and 1 Scarlett Knight**.
CHALLENGES:
If Bakteria or the Scarlett Knight are revealed on the FOP, you must engage them at the start of the Action Round. If both show up, Scarlett Knight will be the one to engage.
**Once you defeat 1 of them, shuffle the Ancient Conductor into the Pull Pile.**
The Control Room (Lv3)
To access the Control Room, **you must enter a Hallway, then a Corner, then the False Wall in that order.**
When you reach the False Wall, disregard its CCS/NAV Points/Effect. Instead, place the Control Room Card on top of the False Wall, but only gain the Sanity bonus.
**To cleanse the Painite Gem, discard a Mirror Piece and lose 6 Sanity. **
The Fun War 🎈 (Lv3)
Once the Painite Gem is purified, all Partygoers become friendly entities, and their Sanity loss effect can be disregarded if one or more are on the FOP.
If you engage a Partygoer, **they restore 3 Sanity and are then added to your inventory** in one of the slots. **Any amount of Partygoers may be placed into the same slot.**
Partygoers may be used while you’re engaged with the Ancient Conductor and deal 3 Damage to him.
If you also have a Partypooper as your companion, all Partygoers do an additional +1 Damage.
**To complete this challenge, you must defeat the Ancient Conductor using only damage from Partygoers.**
The Toxic Hallways (Lv1)
The Conductor has flooded the halls with deadly fumes. Poisoned Halls now are more deadly than ever before. If you have a Gas Mask when entering a Poisoned Hall, you now gain only 2 cards from the PP instead of 3. If you don’t have a Gas Mask, it now deals 4 DIH damage to you.
With the Ancient Conductor loose and raging through the Lobby Levels, the fate of the Backrooms hangs in the balance.
Will you take this fight on by yourself, leaving the Partygoers to terrorize others while you make your escape? Or will you purify the Painite, thus allowing you to rally the freed Partygoers into your own personal army?
The choice is yours, Wanderer!
As usual, complete as many challenges as you can in a single run, then submit to the for validation by the team!
Keep on Running, Wanderers!
-The Backrooms TCG Team
Collapsible content
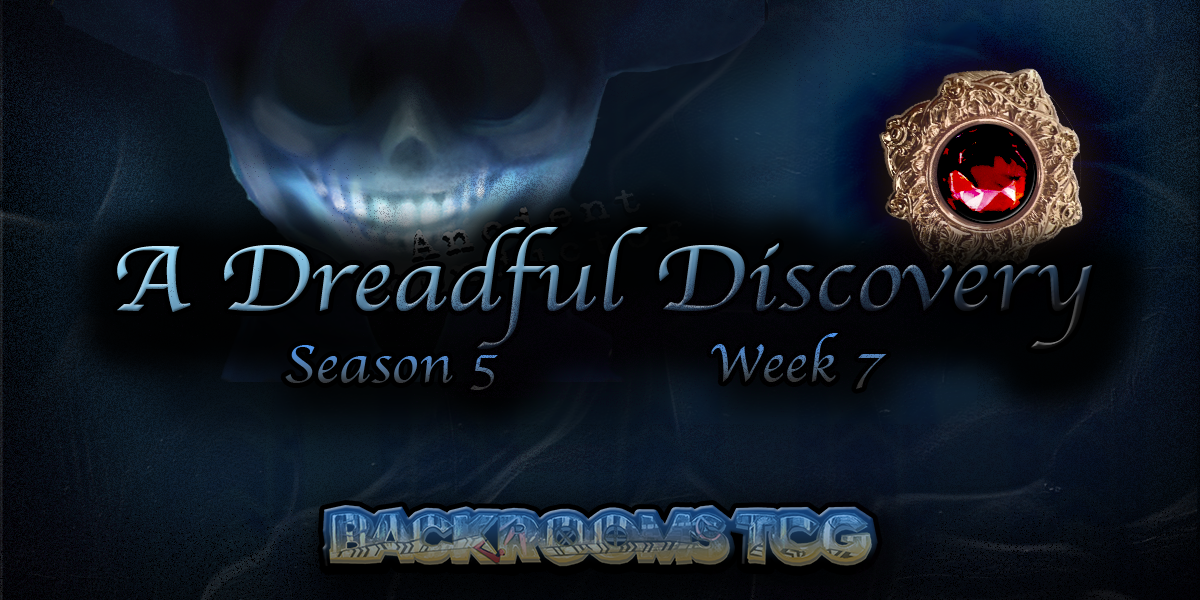
Week Seven: A Dread Discovery
Scenario Designed by MegaElite19 and refined by NowayArtemus
The Final Confrontation
The battle has been long and grueling, but as you land the final strike, The Ancient Conductor staggers. His twisted grin remains as he speaks in a hoarse voice that grows in fury as he speaks:
"You think this is victory? You think you can escape? I am the Backrooms. I make the rules. And no one ever truly leaves. No One!"
With a haggard chuckle, he retrieves a darkened swirling Painite Gem from his coat pocket, a pulsating dark red glow emanating from it. Before you have a chance to even react, he hurls it against the wall where it shatters into thousands of gleaming crimson shards. A distortion ripples through the space, forming a dark passage. Then, with a final breath, he collapses to the ground as the light flickers deep within his cavernous eye sockets.
Cautiously, you peer into the newly opened portal, spotting a desolate, dimly lit parking structure that’s strewn with abandoned cars and forgotten debris. You watch as the Painite shards begin slowly rolling along the ground into the portal and clump together as if magnified, seeming to re-form into a single gem that, even in its incomplete form, is pulsing with an ominous energy.
Taking a deep breath, you follow the gem shards through the portal. As your feet touch the cold concrete, the Gem flares up, flooding the area with an unnatural, blood-red light. Then, you see a figure materializing out of the gem before you, a tall man in a dark coat with a hat perched atop his head. The figure turns toward you, and your stomach drops. On his face, you see a familiar smile that makes your skin shiver with fear and disbelief. It’s practically the same smile as...
"What's that look for, Wanderer?" he taunts, eyes like slits with a malicious twinkle in each corner. "You recognize me? No, you must be mistaken!" He cackles, the sound bouncing around the vast emptiness of the Car Park. "I am The Tollkeeper! I rule this level, you see. Perhaps... I am tied to the Conductor in some way? Or maybe… I am the creator of the Backrooms." His grin widens, stretching beyond human limits. "And you? You're just another hopeless wandering fool who thinks they can change the rules."
You instinctively move to retreat, but with a flick of his wrist, The Tollkeeper seals the portal shut behind you to your horror and disbelief.
"Oh no, no, no, we’re not done yet. I can’t lie, you impressed me back there. I haven't had this much fun in ages! But let’s not get ahead of ourselves… I have some important matters to attend to. We’ll continue this little game soon enough."
With that, he hops into a swirling black void and vanishes. The air is thick with a miasmic sense of building dread. You feel your mind racing as the thought of a hundred eyes look down upon you in these twisted circumstances. You wonder what matters this Tollkeeper went off to handle, but realize thinking about it won’t do much good. Instead, you must decide how to deal with the situation at hand.
Will you look for others to save from this concrete jungle, or will you track the Tollkeeper down before he gets up to whatever dastardly deeds he intends to do?
NOTE: For this scenario, you must build a Car Park Level deck.
PATH 1: Saving the Lost
As you navigate the endless concrete labyrinth you’ve been trapped in, you begin to realize the true extent of the horror of The Tollkeeper’s reign. Blood-curdling screams echo from unseen straight-a-ways. Shadows cast by blinking car lights twist and contort in unnatural ways, mimicking both man and monster alike. The parking structure that seemed to be empty when you initially stepped into it is now infested with relentless entities. You can see how the Tollkeeper’s influence has spread like a disease.
But amidst the horror, you find them, the lost and confused Wanderers who fell in here by total chance. They are helpless and desperate to escape, and without your help, you know that they won’t survive on their own.
You decide then and there, you won’t fight just for yourself, but for all those who can’t save themselves.
Set Up: Set the Tollkeeper in the NLD zone, along with 4 Destroyed Lots. You must have 4 Abandoned Lots in your deck and at least 2 Enforcers.
CHALLENGES:
No One Left Behind (Lv3) You must find and rescue as many wanderers as possible. Each time you defeat a Gem-Eligible entity and gain a Painite Gem, place the defeated entity face down in your Inventory as a Lost Wanderer. Any number of these Painites/Wanderers can be placed into the same Inventory slot.
You must enter the Golden Exit three times, each time representing the evacuation of lost wanderers. When you move into the Golden Exit, discard all Painite Gems from your Inventory, and gain 10 Sanity. Disregard the Sanity gain printed on the Exit card. Once this is completed, you may find the Golden Exit and finally leave.
Dark Forces (Lv3/4) The Enforcers have been corrupted by The Tollkeeper’s power. They are now Gem-eligible but also deal 3 DiH damage and have 6 Life. Engaging them now costs 6 Sanity instead of 4. You must defeat at least 2 of them, then shuffle the Tollkeeper into the Pull Pile.
If the Tollkeeper appears on the FOP, he automatically engages you. You don’t need to defeat him in order to escape. If you do defeat him, gain an extra challenge point.
Seismic Dangers (Lv2) The Tollkeeper is collapsing portions of the level to cut off escape routes. Each time you move off of an Abandoned Lot, replace it with a Destroyed Lot from the NLD zone and place the Abandoned Lot into the NLD zone, permanently altering the environment.
PATH 2: The Tollkeeper’s Challenge
You refuse to play by the Tollkeeper’s rules. If he wants to mock you, to challenge you, then you will find him and take him out, and finally end this madness.
Signs appear along the walls as you search for supplies, taunting you. “Find me, if you dare.” The arrogance is unbearable, but it also serves as a guide. You follow the path, venturing deeper into his twisted domain with a mixture of fear and determination.
As the oppressive presence of the Tollkeeper looms over your every move, the Vending Rooms hold a vital promise of supplies. Said to hold items capable of shifting the balance of power in your favor, you feel they are crucial for surviving the escalating madness that threatens to consume you. To access these harbingers of possibility, the Key Card stands out as a beacon of potential, providing a quick and easy route into the Vending Rooms, where the most powerful and elusive tools are said to reside.
With the Tollkeeper’s twisted influence over the domain causing instability at every turn, the Key Card is not merely a symbol of progress, but also a key to survival. Its use in the Vending Rooms allows you to secure crucial resources that could prove to be pivotal in the final confrontation against the Tollkeeper.
In your quest to bring an end to the Tollkeeper’s reign of terror, the Vending Rooms may be the only source of critical supplies to survive the madness. Obtaining the Key Card is therefore not a luxury but a necessity, a means to equip yourself for the fight ahead, and perhaps, to unlock the secret weapons that will ultimately help you defeat him.
But beware, for he may not go down so easily. It is said that his ultimate form holds a powerful ability to bounce back as he keeps a stranglehold on his place in this dark realm.
Set up: Leave the Golden Exit out of the deck for this Path. You must have 2 copies of the Void, 1 Key Card, and 2 Vending Rooms in your deck.
CHALLENGES:
Between a Void and a Hard Place (Lv2) This place has the ability to become more and more twisted the longer you stick around. The Tollkeeper’s powers have done things you’ve never seen before, and his Void hopping ability seems to have created even more instability than you could have ever imagined. In order to find the Tollkeeper, you must fight madness with madness. Find and use the Memory Fluid while both Voids are on the Field of Play. Once you do this, you begin to see through his illusions! After using the Memory Fluid, shuffle the Tollkeeper into your Deck in Hand.
Vending Visits (Lv2) One of the best kept secrets of the Car Parks are the Vending rooms, where you might find some incredible items that can help you in the final battle against the villainous force that seems to be watching your every move. Interact with the Vending Room twice, once by using a Key Card and once by paying a Painite Gem.
Souvenir (Lv1) You must exit the Car Park with the Key Card in your Inventory. This unique item allows you access to some special places. You marvel at its fascinating design and feel compelled to bring it with you when you finally make your escape.
I Am the Tollkeeper! (Lv4) You must defeat the Tollkeeper twice to take him out!
You must engage and defeat The Tollkeeper. Once he is defeated, he immediately discards all attached attack items and gets shuffled into your Deck in Hand.
Once he is revealed on the FOP again, he immediately engages you in his ultimate form. He now deals 3DIH each round, and causes -12 Sanity Loss upon engagement. He has 13 Health.
If you would defeat him in his ultimate form, flip the Position token. If it lands Compass side up, discard the last attack item you used against him, and the fight continues.
NOTE: Once you defeat him, you automatically win the Scenario with no need to find the Golden Exit!
This is not the end. The Painite Gem holds more secrets. And you will soon uncover them...
Collapsible content
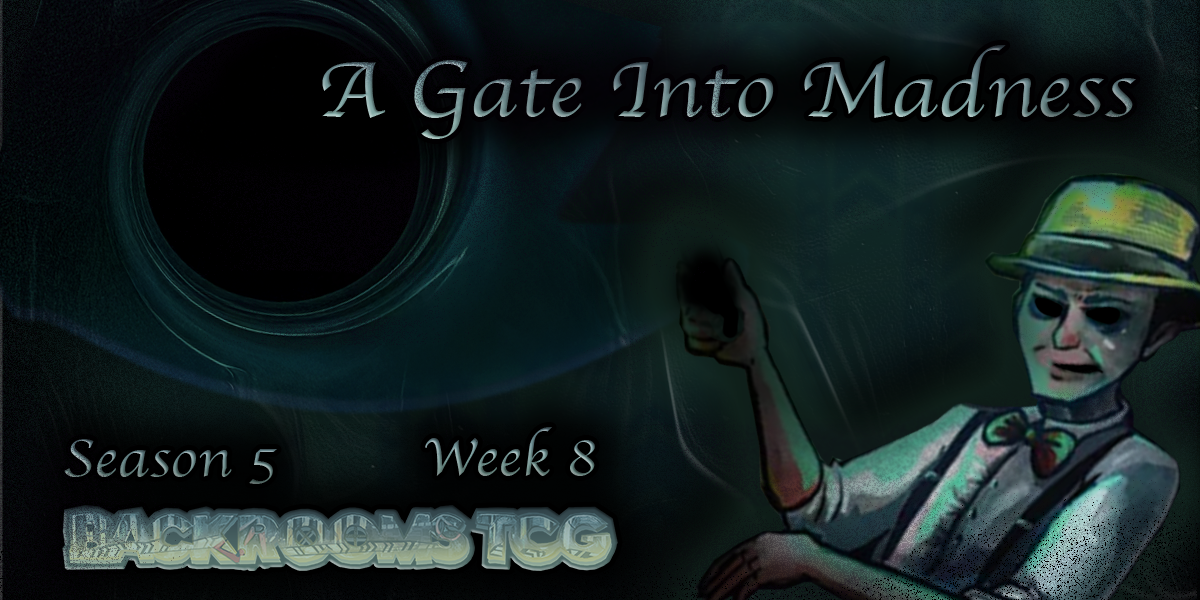
Week 8: A Gate Into Madness
Scenario Designed by @MegaElite19 and Refined by NowayArtemus
Welcome back @Wanderer for the final week of Season 5! We present to you the conclusion to this particular arc in backrooms challenge history. Unlike the rest of the season, there's only one path for you to follow, so tread carefully! Things are really heating up! Presenting...
A GATE INTO MADNESS
As you land your final blow in the cataclysmic encounter with the unleashed Tollkeeper, his eyes widen in despair and realization of his impending conclusion.
"I... I can't believe it. Defeated by you... just some pathetic Wanderer..." the Tollkeeper shudders as his form unravels. "I need… more… strength..."
Dark energy crackles from his fingertips as he summons a dark swirling portal. Through it, you catch sight of strange flooded chambers lined with pristine white tile. Giant multi-colored slides twist into shadowed tunnels as vague, shifting shapes you cannot recognize float through the watery depths. With a quick, abrupt motion, the Tollkeeper smashes his Painite Gem into four jagged shards before hurling them through the portal right before the gateway snaps shut.
He latches onto your arm tightly, his voice low and shaking with anger.
“The gem is now split into shards that I’ve scattered deep within the Aqua Zone Levels of the Backrooms. Each will draw power from that realm, growing stronger and eventually reforging into something even more dangerous. Here's the truth, wanderer: that wasn’t just a Painite Gem. That was Painite Essence. The Conductor and me, we are the same. We are the Essence. We ARE the Backrooms. This is a losing battle, and the deeper you go, the harder it will be to escape. You’ll never reclaim the Essence. You’ll never stop the Backrooms!”
With that, he finally collapses, his grip releasing at last as his spirit appears to vacate his crumpled form.
You stare down at him, heart racing and breath ragged in your tight chest.
“So... the Backrooms themselves are my enemy? How can I fight something like this? How do I stop this nightmare from devouring everything?” You clench your fists, but resolve to stand firm. “I HAVE to reach the Aqua Zone. If I can track down those shards... maybe I can destroy them for good, and end this madness.”
From behind a crumbling pillar, Mr. Freeman steps forward. He must have heard everything.
“My boy... this is worse than I feared. But if those shards are no longer in the Tollkeeper’s destructive hands, there may be hope. I need to study them to be sure, though. We must locate them, and if possible—find a way to destroy the Backrooms from within. Too many brave wanderers have vanished in these cursed levels, hunted by horrors that defy the mind. I’ll come with you. Let’s find a way into the Aqua Zone Level. I’ll establish a base with my research team. We’ll make it through together, I’m sure of it!”
---
Final Path: Watery Hopes
Your objective for this scenario is to escort Mr. Freeman to the Fire Exit and enter the Aqua Zone together to retrieve the Painite shards. Be warned, however! Wanderers have reported increasingly hyper-aggressive behavior from Wyrms. Crimson light has been seen flickering like lighting around their bodies and echoing through the Car Park levels. Something is hunting you, and has been since the very beginning...
SETUP
This scenario requires you to build a Car Park deck.
Place Mr. Freeman in your inventory before the game begins. He may not be discarded by any means. You must have at least 2 Scarlett Wyrms in your deck, as well as 1 Scarlett Knight (The Not So Digital Comic promo or Full Art if possible, though the default non-holo version is ok too if you don’t have any other versions), and 1 Fire Exit, which will replace the Golden Exit.
Place the Scarlett Knight and Fire Exit into the NLD zone. (edited)
NEW
[4:41 PM]
---
CHALLENGES
The Deep End (LV3)
Your challenge is to escort Freeman safely to the Fire Exit.
While Mr. Freeman is your Companion, he has 6 Life. When engaging an Unfriendly Entity, flip the Position Token:
If you flip Compass side up, nothing happens. You may continue your engagement with no extra effects. However, if you flip Gem-Side up, the entity immediately deals its DIH damage to Freeman before continuing the engagement.
You may use Almond Water, Death Moth Jelly, or Death Moth Brew to heal Freeman. Discard the item and heal him by a number of health equal to the Sanity gain the item would give you.
---
Scarlett Reminiscences (LV3)
The dangerous Scarlett Wyrms roam the Backrooms, wreaking havoc wherever they go. Engage and defeat 2 Scarlett Wyrms to complete this challenge. After defeating both Wyrms, shuffle The Scarlett Knight into your DIH. You then gain the Scarlett Mark, which provides +1 damage for all Attack items used. Additionally, Scarlett Knight can no longer deal any Damage to Mr. Freeman when you engage her.
---
The Red Tide (LV3)
In the darkness of the Backrooms, you must face down the overwhelming strength of the terrifying Scarlett Knight once more before you may finally enter the Fire Exit with Freeman.
Seething with vengeance for the death of her beloved Conductor, she refuses to relent in her assault against you, even though you managed to defeat her soundly in your first battle.
When the Scarlett Knight appears on the FOP, she instantly engages you.
At the end of every Action Round, she will heal 2 HP. Once you defeat her, you may then shuffle the Fire Exit into your Deck in Hand. You must have a Painite Gem in order to enter the Fire Exit and leave.
---
EPILOGUE
The Scarlett Knight falls. The path ahead clears.
You step into the Fire Exit, and into a submerged world of watery silence and strange, alien beauty. Freeman surveys the surroundings with awe.
“This is it. I’ll set up a research encampment with my team. We’ll push forward from here. Please, find those shards before it’s too late. Be cautious... no one in my experience has ever ventured this deep into the Backrooms and returned to tell the tale.”
With those words and a clear goal ahead, your journey continues.
This is far from over.
The Painite Essence holds secrets yet unrevealed.
And soon... you will uncover them.
As usual, complete as many challenges as you can in this final week and submit to the weekly-challenge-submissions thread for validation!
We hope you had a great time this season, Wanderers!
Tread carefully, and we will return at the end of the month to announce the final scores for all participants.
Keep on Running!
-The Backrooms TCG Team